Building and Deploying Jigsaw with Bitbucket Pipelines
Jim O'Halloran • October 4, 2021
amazon-web-services bitbucket-pipelinesWhen I set up my new Blog, I wanted a few things:
- Content is just a bunch of markdown files in git.
- Serverless HTTPS hosting that needs no maintenance.
- Git push to publish.
Tighten Co's Jigsaw gave me a CMS that can build a pretty nice blog from markdown. Then I jumped through a few hoops to get S3 and Cloudfront serving HTTPS on my domain. This was fairly straightforward, but I hadn't done it before, so I followed this guide for help. The guide wasn't perfect, but it got me close enough that I could troubleshoot my way to success.
So that ticked the first two boxes, but what about "git push to publish"? Given that I can build the entire Jigsaw site from a few commands, and updating the site it's a case of syncing the build content to S3 and invalidating CloudFront, this seems like a problem that a Continuous Integration (CI) process can solve. Which is where Bitbucket Pipelines comes into play.
AWS Preparation
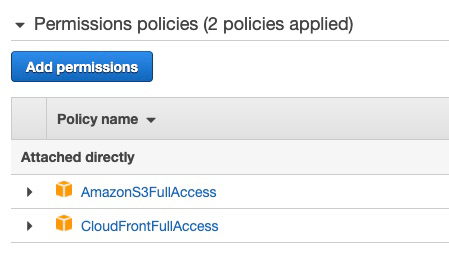
Once Bitbucket Pipelines build the Jigsaw site, we're going to need to upload the content to S3 and invalidate the CloudFront cache. That'll need some kind of AWS API usage, and I don't want to go putting "superuser" credentials into my Pipeline.
So before we go too far, lets create a user in IAM just for this purpose. You
could (and probably should) create an IAM policy that grants access to just the
required S3 bucket, and only allows invalidation operations on CloudFront. I
didn't go quite that far and instead use the existing AmazonS3FullAccess
and CloudFrontFullAccess policies provided by AWS.
Create a new user with those policies attached, and generate Access and Secret keys. You'll need these later.
Setting up the Pipeline
Next, we need to create a file in the root directory of the repository
called bitbucket-pipelines.yml with the following contents:
image: composer:2.0

pipelines:
  branches:
    main:
      - step:
          name: Composer Install
          script:
            -  composer install
          caches:
            - composer
          artifacts:
            - vendor/**
      - step:
          name: Generate frontend assets
          image: node:12
          caches:
            - node
          script:
            - npm ci
            - npm run prod
          artifacts:
            - vendor/**
            - source/assets/build/**
            - build_production/**
      - step:
          name: Build Jigsaw
          script:
            -  ./vendor/bin/jigsaw build production
          caches:
            - composer
          artifacts:
            - build_production/**
      - step:
          name: Deploy to S3
          deployment: Production
          clone:
            enabled: false
          script:
            - pipe: atlassian/aws-s3-deploy:0.4.4
              variables:
                AWS_ACCESS_KEY_ID: $AWS_ACCESS_KEY_ID
                AWS_SECRET_ACCESS_KEY: $AWS_SECRET_ACCESS_KEY
                AWS_DEFAULT_REGION: $AWS_DEFAULT_REGION
                S3_BUCKET: $AWS_S3_BUCKET
                LOCAL_PATH: 'build_production'
                DELETE_FLAG: 'true'
                ACL: 'public-read'
            - pipe: atlassian/aws-cloudfront-invalidate:0.1.1
              variables:
                AWS_ACCESS_KEY_ID: $AWS_ACCESS_KEY_ID
                AWS_SECRET_ACCESS_KEY: $AWS_SECRET_ACCESS_KEY
                AWS_DEFAULT_REGION: $AWS_DEFAULT_REGION
                DISTRIBUTION_ID: $DISTRIBUTION_ID
There's a lot here, so lets work through it. This build process defines a number
of steps that only run on the main branch of the repository. I chose to run
the pipeline for main only because I might want to use git branches to
store draft posts that I'm not ready to publish yet.
The first step does a composer install to get all the PHP dependencies
required by Jigsaw in place. Then the second step uses the node image to
install the Javascript dependencies and run the asset build that creates the
CSS, etc. Next we run the Jigsaw build itself. If you've used Jigsaw you'll
probably recognise these commands as what you would have run on the command
line. Along the way we're using Pipelines' caches and artifacts to ensure that
the files we've just installed or built aren't thrown away at the end of the
build step.
There's a bit of a chicken and egg situation going on here. I'd like to install all the js and build it, then install PHP deps and build Jigsaw. However, the front end asset build requires the PHP deps, and I can't build Jigsaw until the front end build is done. Hence, we do the PHP install, JS install, JS build and PHP build dance.
Finally, there's a step that uses two pre-existing pipes to do the S3 deploy, and the CloudFront Invalidate.
Next you'll need to go into "Deployments" in bitbucket, and create a " Production" environment if on doesn't exist already. Add the following variables to the "Production" environment, which will give Pipelines access to your AWS environment and direct towards the right S3 button and CloudFront distribution.
AWS_ACCESS_KEY_ID- The Access Key ID for the user we created earlier. I made this "Secured" so the value isn't visible in the console.AWS_SECRET_ACCESS_KEY- The Secret Access key. This should definitely be "Secured".AWS_DEFAULT_REGION- The region for your S3 bucket.AWS_S3_BUCKET- The name of the S3 bucket containing the website content.DISTRIBUTION_ID- The ID of the CloudFont distribution that we'll need to invalidate (clear) on deployment.
With that completed, pushing a new commit to the main branch in the git repo
containing your Jigsaw site should kick off a build, and deploy the new site
content to S3. If you're seeing this, then it all worked for me!
Cost?
For me, each build takes around 2 minutes. BitBucket gives you 50 minutes of Pipelines per month for free. So unless I publish a lot, I'm not going to need to pay for Pipelines to keep posting. I've set up Docker containers for my Jigsaw install so that I can run it locally, which is great for previewing posts before pushing to BitBucket. That helps avoid wasting build minutes by allowing me to see the "built" post before it goes through the Pipeline.
Conclusion
So there we have it, a CI pipeline that gives us "push to deploy" functionality for the Jigsaw CMS. I've pushed the last few blog posts through this process, and it "just works". I couldn't be happier with this overall combination.